A Digital SLR For Christmas!!
Your very first
DSLR!
(Digital Single Lens Reflex) This is a big step up from a
“Point-and-Shoot” or an iPhone camera. Whether the camera is for
taking pictures of the kids, landscapes, or food, learning how to use
a DSLR can be intimidating. All of the buttons and settings come
together to make either an artistic photograph, or a complete mess.
But relax, with a few simple pointers, you'll be taking pictures like
a pro in no time.
Get out and shoot
The good news is that most DSLR's have very similar controls and
settings, so it doesn't take long to get the basics down so you can
get out and start shooting. It doesn't matter if your camera is made
by Nikon, Canon, Fuji, or whatever. Read the Quick Start booklet
that came with your camera. Put in the battery, and the memory card
and let's take some pictures!
Attach the Kit Lens
Your camera probably came with a “Kit Lens”, which is usually
a standard zoom lens 18-55mm. To attach the lens, most cameras have
a small dot that lines up with a similar dot on the lens. Put the
dots together and turn the lens until it clicks into place. Don't
force it! Don't forget to take the lens cap off! When you look
through the camera's eyepiece you can see through the lens. If you
rotate the lens barrel, it makes the picture zoom in or out.
Stay in AUTO Mode
Most cameras will have a dial on the top or back of the camera to
set the mode. I always recommend beginners to put the camera on AUTO
and keep it there. This let's the camera's brain computer figure out
the settings for a proper exposure. What about all those other
buttons and settings? For now, “forget about it...” Too often,
beginners obsess about learning all the manual settings for aperture,
shutter speed and ISO (pronounced “Eye-Ess-Oh”) and they get
frustrated. Instead of getting frustrated, get out and take a few
thousand pictures.
Picture Format (RAW or JPEG)
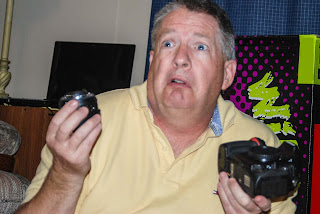
The only setting I would give some thought to and check would be
the picture format, or sometimes referred to as picture quality
(although quality doesn't have much to do with it). As a beginner,
you'll want to shoot pictures in JPEG (pronounced “jay-peg”).
Raw format gives you more flexibility in editing (or correcting) the
pictures on your computer, but that comes later.
Memory Card
If your camera didn't come with a memory card, you'll need one.
The most common types of memory cards are the SDHC. They come in all
different capacities. An 8GB memory card can hold over a thousand
JPEG images. The cards also have speed ratings. Get a good brand,
with a high speed transfer rate. You've got a good camera, don't buy
the cheapest memory card!
Shoot!
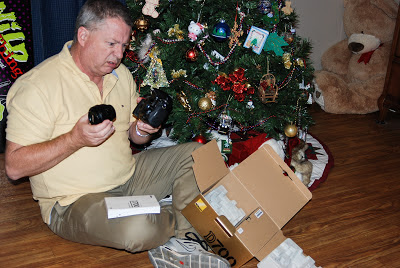
Once you have your battery, and memory card in the camera,
settings on AUTO, and shooting JPEG, it's time to take this baby on a
test drive. Look through the viewfinder. When you press the shutter
button half way, it will adjust the focus. When you press it all the
way, you'll hear the shutter click, and the image will appear on the
LCD screen of the computer. If you're indoors, and the light is dim,
your camera may activate the on-camera flash. Not all camera models
have a built-in flash, but most of the entry level DSLR's do. It
will use the flash when it thinks it needs it. Take pictures of the
dog, the cat, your family, the Christmas tree, your garden, the
mailman, and everything else. I challenge you to try and drain the
battery or fill up your memory card with pictures.
Downloading
When you have finished shooting, it's time to download the images
to your computer. Check your user manual, but generally, you can do
this two ways: connect a USB cable from your camera to the computer,
or remove the memory card from the camera and put it in a card reader
or SD slot on your computer. (A lot of newer computers have card
readers built into them) Your PC or Mac can read the JPEG format,
and you can view your work. As you become more advanced, you'll want
to be able to edit and correct some of the photographs. You'll need
a software program like Adobe Lightroom or Google's Picasa to edit.
Gear Lust
One of the worst traps to fall into once you enter the world of
DSLR's is “gear lust”. This is where you convince yourself that
you'll be able to take better pictures if you have a better camera or
better lens. I don't know how many times, I've had someone contact
me and tell me that the reason their images are blurry is because
they don't have the right kind of lens. While it is true that some
equipment is better than others in low light, or fast moving sports
action, the problem is usually six inches
behind
the camera. If this is a hobby that you are going to get into, take
baby steps. Use your entry level camera and kit lens for a year
before you start adding or upgrading equipment. During that year,
learn everything you can about your camera. Learn about exposure.
Learn about light. If you think you can't produce quality
photographs with a kit lens, check out some of the Flickr groups that
only post
images
from a kit lens.
Useful Gear
There are a few items that are extremely useful to beginners.
There will come a time when you'll need a flash unit, sometimes
called a “Speedlight”. These flashes are more powerful than the
on-camera flash and can be used very creatively. Although there are
many brands that probably work with your camera, your first flash
should be the same brand as your camera. This is important because
the flash needs to “talk” to your camera. Many times, with off
brand flash equipment, you have to set up the flash power settings
manually. When I put my Nikon Flash on my Nikon camera, it always
gives me a perfect exposure flash because the flash gets all of its
settings from the camera.
The next item that you'll need is a tripod. A tripod is essential
for things like shooting at night. Tripods come in a variety of
styles and brands. As a beginner, I always recommend just a cheap
basic one. You'll be amazed at how much sharper the image is when
you use a tripod.
When the time comes that you'll want to add a lens to your system,
the one I always recommend is the 50mm prime. A prime lens is one
that does not zoom in or out. It stays at a constant focal length.
A 50mm (sometimes called the “nifty fifty”) is a beautiful
portrait lens, and great for walking around the city doing street
photography. The best part about the 50mm is that you can usually
pick one up for less than $200. They are great in low light, and
fast to focus.
Learning
Some people seem to learn by reading books, others prefer to watch
videos. There are literally millions of books and videos available
to the novice photographer. Just the selection of material can be
overwhelming.
Books
The
“Digital
Photography” series of books by Scott Kelby are some of the
best. Kelby's style of writing makes it easy to understand, and he
throws in a lot of humor too.
Eventually, you'll want to take the camera off the “AUTO”
mode, and learn about aperture, shutter speed, and ISO. When that
time comes, the best book for learning about manual settings is
“Understanding
Exposure” by Bryan Peterson. I've had this book for over two
years, and I keep going back to it as a reference. It's well
written, and under $20, it's a bargain.
I admit that I'm not a big fan of the “Dummies” series of
books, but a lot of people love them.
“Digital
SLR Cameras and Photography for Dummies” by David Busch looks
interesting, and again for less than $20 at Amazon.
Video
One of the biggest ways that the internet has changed our life, is
with streaming video on the net. The amount of video tutorials
available online is mind boggling.
Do
a YouTube search on the phrase “Photography Tutorial” and I
got 285,000 results. Even though the videos are free, you'll
question whether some are worth that.
Here's
a video that I found some time ago, and it explains the basics of
exposure in a way that's easy to understand.
Here's
another one by the same kid, that explains metering and exposure
stops.
If you're looking for quality video instruction, I'd recommend
KelbyTraining.com (No, I'm
not on Scott Kelby's payroll, he just does good work!) For a low
subscription fee, you can watch all the videos you want. The one's
I've seen are all good. You'll get video instruction by some of the
top photographers in the country. From basics to advanced
techniques.
Summary
Congratulations on your new camera, and the world of DSLR's. It's
a money pit that is second only to golf and Harley Davidson
motorcycles. The best way to get over the intimidation of the camera
is to get out and take pictures. Then take a few thousand more.
Don't buy any more gear until you wear out the basic kit. You don't
need more gear to take better pictures. Photography is an art. Art
cannot be achieved in a few days. You'll need to study. You'll need
to learn. What are you doing reading this on your computer? Grab
your camera and go shoot!
Richard Spears is a
photographer and free lance writer in San Antonio Texas.
Www.rspearsphotography.com
photographs courtesy of Kelly Janetsky. No part of this article may
be re-printed without consent of the author.


